Savory Beef Arm Roast Recipe: Your Guide to a Perfectly Tender Family Dinner Feast
- Discover a savory beef arm roast recipe perfect for family dinners.
- Learn the secrets to making your beef succulent and tender.
- Explore tips for pairing this main dish with the perfect sides.
Ever found yourself wondering how to transform a simple beef arm roast into a mouthwatering centerpiece for your family dinner? You’re not alone. In the quest for a meal that delights, the quest for the perfect beef arm roast recipe is a noble one. And today, we’re going to embark on that journey together.
Now, imagine the aroma of a perfectly cooked beef roast wafting through your home. Picture the smiles and hear the contented sighs as your loved ones savor each tender bite. Indeed, main dishes like a beef arm roast can turn an ordinary evening into a feast to remember. But achieving that level of perfection can be elusive, can’t it?
Fortunately, with this step-by-step guide, you’re about to unlock the secrets to cooking beef that’s not just flavorful, but also so tender it practically melts in your mouth. Moreover, we’ll delve into the world of Main Dishes, specifically the beloved Beef category, to ensure your culinary success. So, roll up your sleeves and let’s get cooking!

Preparing to Make Beef Arm Roast
So, you’re ready to take on the beef arm roast. But how complex is this endeavor? Rest assured, the Beef Arm Roast Recipe Difficulty is moderate, making it a rewarding project for cooks of various skill levels. Whether you’re a novice or a seasoned chef, you’ll find this recipe manageable. Remember, though, perfection takes time. Set aside a few hours to lovingly craft this dish to succulent completion.
Kitchen Tools for Roast
Before diving in, let’s talk tools. For a flawless beef arm roast, you’ll need:
- A sturdy roasting pan, capable of handling the roast’s weight.
- A reliable meat thermometer, ensuring your roast reaches the ideal internal temperature.
- Sharp knives for trimming any excess fat and for carving the roast post-cooking.
- And don’t forget the aluminum foil for tenting your roast, which helps in heat distribution and moisture retention.
Now, onto the Beef Roast Preparation Tips. First, let your roast reach room temperature before cooking. This step is crucial for even cooking. Next, season generously. Don’t shy away from your favorite herbs and spices. Finally, sear the meat on all sides before roasting. This locks in those delectable juices, ensuring every slice is as moist as the last.
For inspiration and additional beef recipes that can elevate any meal, take a look at Jessica Gavin’s collection of beef main dishes. With a bit of preparation and the right tools, your beef arm roast will not only be a showstopper but also a testament to your culinary prowess.
Ingredients for the Perfect Beef Arm Roast
Now that we’ve covered the minimal equipment needed, let’s pivot to the stars of the show: the ingredients. The right selection of fresh and pantry staples can elevate your beef arm roast from just another meal to a memorable feast. Ever heard the saying, “You are what you eat”? Well, your roast is what it’s made of, so let’s ensure it’s made of the best!
A Carefully Curated Ingredient List
Whether you’re cooking for a cozy family dinner or a larger gathering, getting the ingredient measurements right is key. But first, what will you need? I’ve put together a comprehensive Beef Arm Roast Ingredients list that will serve as your blueprint. Remember, the quality of your High-Quality Beef Cuts is paramount. Opt for the best your budget allows for a truly tender and flavorful roast.
Main Ingredient:
- 1 (3-4 pound) beef arm roast
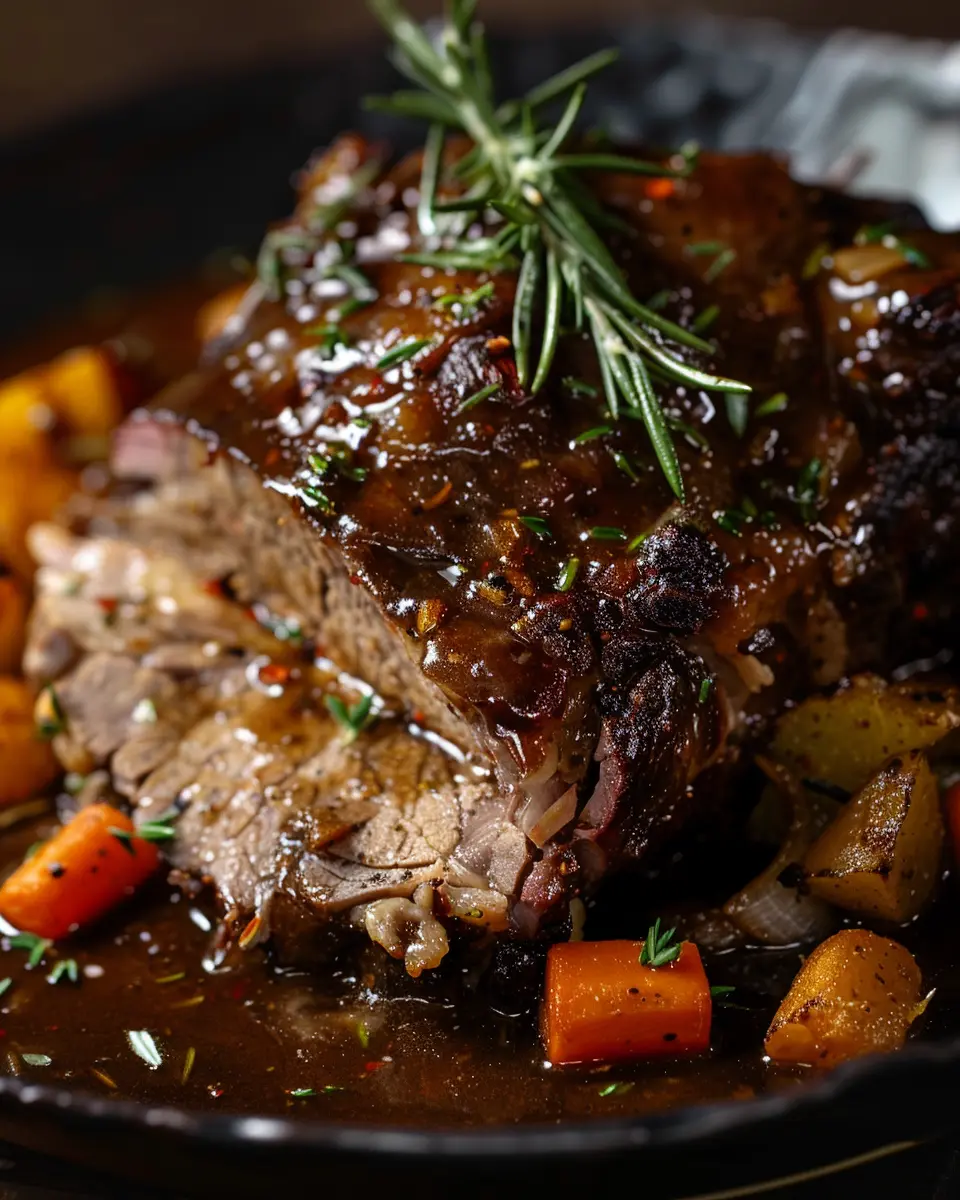
Fresh Ingredients:
- 4 carrots, peeled and chopped
- 3 celery stalks, chopped
- 1 large onion, sliced
- 4 garlic cloves, minced
Pantry Ingredients:
- 2 cups beef broth
- 1/4 cup Worcestershire sauce
- 1 tablespoon olive oil
- 1 teaspoon salt
- 1/2 teaspoon black pepper
- 1 teaspoon dried rosemary
- 1 teaspoon dried thyme
Got your list ready? Excellent! Now, for those cooking for more, simply scale up the Ingredient Measurements Guide proportionally. And for smaller servings, do the opposite. It’s that simple! Keep an eye on the size of your roast and adjust the fresh and pantry ingredients accordingly. Your taste buds (and guests) will thank you!

Step-by-Step Guide to Crafting Your Beef Arm Roast
Now that you’ve got your ingredients lined up, let’s dive into the cooking beef arm roast. Are you ready to transform that beef arm roast into a succulent, mouth-watering meal? Follow these steps closely for the best results!
Let’s Get Cooking!
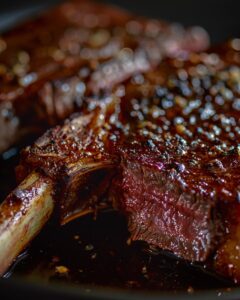
First things first, preheat your oven to a cozy 275°F (135°C). This low and slow approach will ensure your roast is cooked evenly throughout. While the oven warms up, let’s talk about searing beef techniques. Searing the beef is crucial; it creates a delicious crust and seals in those flavors. So, heat a bit of oil in a heavy skillet over high heat. You’ll want to see that beef sizzle the moment it touches the pan. Give each side a good 3-4 minutes to develop that rich, golden-brown sear.
- Once your roast is beautifully browned, transfer it to a roasting pan. If you have a wire rack, place the roast on top to allow heat circulation for an even cook.
- Next, slide your pan into the preheated oven. We’re aiming for an internal temperature of around 145°F (63°C) for medium-rare. Depending on the size of your roast, this could take about 3 hours, so patience is key!
- About halfway through, check on your roast. If it’s looking a bit dry, don’t hesitate to add a splash of beef broth to the pan. This will keep it moist and add an extra layer of flavor.
- Once you hit the target temperature, remove the roast from the oven. Now, here’s where resting meat for tenderness comes into play. Tent your roast with aluminum foil and let it rest for at least 20 minutes. This pause allows the juices to redistribute, making each slice succulent and tender.
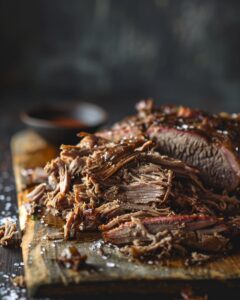
After the rest, it’s time to carve. Slice against the grain for the tenderest cuts. Serve up your masterpiece with your favorite sides, and watch as your guests marvel at the flavors you’ve locked in. Who knew cooking beef arm roast could be such a delightful adventure?
Serving and Storing Beef Arm Roast
Now that you’ve mastered the art of cooking a succulent Beef Arm Roast, let’s chat about the best ways to serve and store your culinary masterpiece. After following our detailed cooking instructions, which highlighted the perfect oven temperatures and cooking times, you’re ready for the grand finale. But before we dive into that, have you taken a moment to appreciate the aromas wafting through your kitchen? They’re a sure sign that you’ve nailed it!
Ready to Serve?
Remember the importance of searing the beef? That’s the secret behind the rich flavors you’re about to enjoy. And let’s not forget the crucial step of resting the meat. Have you allowed it to sit after cooking? This pause is key for ensuring your Beef Arm Roast is as juicy and tender as can be. Now, slice against the grain and serve on a warm platter. Aren’t you excited to see the reactions when you bring it to the table?
But wait, there’s more! You’ve got your Beef Arm Roast Ingredients all measured out and prepped using our Ingredient Measurements Guide, and you’ve chosen only the best High-Quality Beef Cuts. You’ve put in the effort, so let’s make sure none of it goes to waste. Storing leftovers properly means you can relive this delicious experience tomorrow!
Storing for Later
Firstly, ensure your roast has cooled down but isn’t left out for more than two hours to maintain safety. Slice the remaining beef, if you haven’t already, and place it in an airtight container. It’ll keep in the fridge for about 3-4 days. Thinking of saving it for longer? No problem! Your Beef Arm Roast can be frozen for up to 3 months. Just make sure it’s tightly wrapped to prevent freezer burn. When you’re ready to enjoy it again, thaw it in the fridge overnight and reheat gently to preserve its tenderness.
Whether you’re serving it fresh out of the oven or enjoying leftovers, this Beef Arm Roast is sure to be a hit. So, tell me, how did your roast turn out? Share your experience and let’s celebrate the joy of cooking together!

Pro Tips for Mastering the Beef Arm Roast Recipe
- Firstly, select a high-quality beef arm roast for the best flavor.
- Secondly, marinate overnight to deepen the taste and tenderness.
- Moreover, bring the beef to room temperature before cooking.
- Use a meat thermometer to ensure perfect doneness without guesswork.
- Additionally, let the roast rest before slicing to retain juices.
- When serving, slice against the grain for maximum tenderness.
- Lastly, pair with robust sides like roasted vegetables or mashed potatoes.
FAQ: Enhancing Your Beef Arm Roast Experience
After diving into our pro tips, you’re probably itching to perfect your arm roast recipe. Let’s tackle some of the most common questions you might have, ensuring your next roast is nothing short of spectacular.
Popular Questions on Making Arm Roast
Q: What are some Beef Roast Ingredient Substitutions for dietary preferences or restrictions?
A: Absolutely! If you’re avoiding gluten, opt for tamari instead of traditional soy sauce. For a lower-fat option, try using a light vinaigrette instead of oil-based marinades. Vegetarians can even join the fun with a hearty portobello mushroom cap as a stand-in. Here’s a versatile arm roast recipe that can be adapted to your needs.
Q: How can I make a Budget-Friendly Roast without sacrificing quality?
A: It’s all about smart shopping and preparation. Look for sales on beef arm roasts, or buy in bulk and freeze. Vegetables like carrots and potatoes are not only traditional but also economical. Using homemade stock and herbs from your garden can also cut costs significantly.
Q: Any tips for Seasoning Beef Roast to enhance flavor?
A: Start with the basics: salt and pepper. From there, consider the profile you’re aiming for. Herbs like rosemary and thyme add a classic touch, while a dash of paprika can provide a smoky note. Don’t forget to let your roast rest before serving to allow the flavors to fully develop.
More Insights on Beef
Q: Can I still achieve a tender roast if I don’t have a slow cooker?
A: Definitely! An oven can work wonders. Try braising your roast at a low temperature in a covered pot with a bit of liquid. This method can yield a roast that’s just as tender as one from a slow cooker.
Q: What are some common mistakes to avoid when making a beef arm roast?
A: One major pitfall is overcooking, which can lead to a dry and tough roast. Use a meat thermometer to ensure the perfect doneness. Also, be sure not to skimp on the resting time after cooking; it’s crucial for a juicy result.